• For experienced and friendly advice
  • 01768 485050

Natural Insulations

  • Home
  • Our Products
    • Sheep’s Wool Insulation
    • Recycled Insulations
    • Plant Fibre Insulation
    • One Coat Lime Plaster
    • Membranes & Tapes
  • Help & Advice
  • FAQ
  • Blog
  • News
  • Gallery
  • Contact
  • 0 items£0.00
You are here: Home / Archives for joybatey

by

Help! How do I insulate a suspended ground floor?

Before suspended ground floor  were introduced in the early 18th century, it was common practice for boards to be placed directly onto the ground, which often led to issues with rot and dampness.

The design of a suspended timber floor structure positioned over this compacted earth with an air space between allowed for the free movement of air. This ensured that the timbers remained dry and free from rot. This void underneath the suspended floor was ventilated via airbricks or other types of vent in the external walls to ensure an effective air flow through the under-floor area.

However, this airflow also created draughts, and with an uninsulated and poorly sealed floor, the result is heat loss and thermal inefficiency.

Insulating a suspended ground floor

Insulating the suspended timber ground floor is a relatively recent solution that helps prevent draughts and saves energy. This results in a warmer living environment.

If you are not sure if you have a suspended ground floor go outside and look for air or ventilation bricks at the bottom of the outer walls – if you have them, then you have a suspended floor.

When deciding on whether to insulate a suspended ground floor there are a number of issues to look for first:

You must be aware of and manage the risk of moisture before you insulate your suspended ground floor

  • This means that you need to find the source of any moisture, including looking for signs of moisture problems between the joists and outer wall.
  • Check whether the space is well ventilated and record whether the humidity levels change depending on the season. i.e. Is the humidity transient or permanent?
  • Measure the moisture content of the timber joists. A moisture content above 19% indicates humidity in the void is high and you should find ways to improve ventilation under the floor as a first step.

Major signs for excessive moisture in the joists would be:

  • Musty Odours. One of the most common signs of crawl space moisture.
  • High Humidity.
  • Insect activity
  • Sagging Floors.
  • Warping of Wooden Floors

Moisture meters can be used to measure the percentage of water in both walls and joists. These readings can be used to determine if the material is ready for use, unexpectedly wet or dry, or otherwise in need of further inspection. Physical properties are strongly affected by moisture content and high moisture content for a period of time may progressively degrade a material.

Once the moisture levels have been determined as suitable, ensure you have a minimum of 150mm ventilated space from the level of the underside of the insulation. It is time to go ahead and achieve a thermally efficient and airtight suspended floor.

How to insulate a suspended ground floor:

Although insulating a suspended ground floor  is not a particularly easy job it is well worth it. If carried out to best practise standards  it will improve the comfort and energy efficiency in your home. However there are a couple of crucial points to be aware of:

  1. All air vents must be clear
    It is critical to make sure that all air vents under the floor are clear. You must not obstruct the ventilation pathway.
  2. Ventilation is still critical
    Installing new windows / doors etc., in conjunction with insulating a suspended floor, will most probably eliminate uncontrolled ventilation. In a house with no ventilation the air stagnates and feels damp. This is as uncomfortable to live in as one which is draughty and cold. It may therefore be necessary to address this by the introduction of controlled ventilation measures.

How to fit suspended ground floor insulation:

Fitting insulation from below ( looking up)
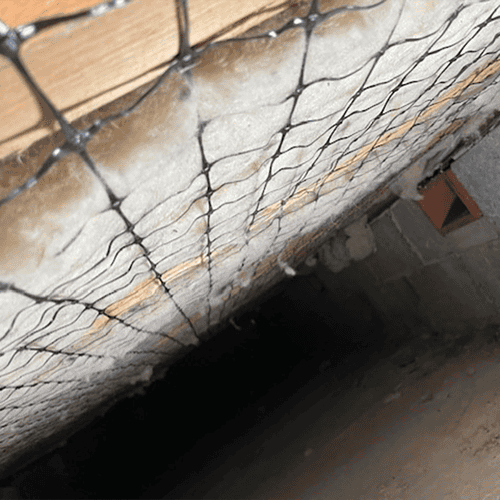
Fit the insulation between the joists ensuring that all joints are close-butted to avoid air gaps. Pay particular attention to the perimeter of the floor, making sure you fill every gap with insulation. For support, use a netting or airtight breather membrane taught across the bottom to keep the insulation in place. A quality netting will keep its condition and stay tight for many years. This ensures  the  insulation stays in place and can do its job of insulating your home, keeping the draughts out.

Fitting insulation from above (having removed the floorboards.)
Start with the netting or breather membrane and hammock it over the joists to provide support for the insulation. Then place the insulation between the floor joists knowing it will stay in place. Prevent debris by laying an airtight breather membrane before replacing floorboards


For more information and typical U-Values take a look at the Floor Application Notes on the website.

Filed Under: Blog Tagged With: breathability, draughts, insulation, sheeps wool insulation, suspended ground floor

by

Help! Should I use sheep’s wool insulation to insulate my camper?

There are many different types of insulation which can be used when converting your van into a campervan. In this blog we concentrate on why we think you should use Thermafleece British sheep’s wool insulation to make sure you stay snug whilst travelling in your van.

The Benefits of using Thermafleece

What are the benefits of using Thermafleece British Sheeps Wool as insulation for my van?

A sustainable Eco Friendly option . .
Thermafleece is made from the wool of hardy British hill sheep, rendering it an eco-friendly and sustainable choice. Additionally, it is made in Yorkshire, making it the only insulation in the UK crafted from British Sheep’s Wool and manufactured domestically.

. . That keeps breathing
Thermafleece is breathable and helps manage moisture within the van. Wool can absorb up to 30% of its own weight in water and still feel dry. It absorbs moisture when humidity is high and releases it when humidity levels drop. In the confined space of a van, anything that helps with moisture management is beneficial. Although remember, breathability is not a substitute for ventilation.

. . Stays cool
In hot weather, the sheep’s wool absorbs heat energy during peak periods of the day, so your van won’t become hot and stuffy. This heat energy is then released through the relative cool of the night.

. . Doesn’t itch
Thermafleece is non-itchy, and is safe to handle during installation compared to traditional fiberglass or rockwool insulation. It helps to lower sources of harmful indoor air pollutants and to reduce formaldehyde in the atmosphere.

Living Peacefully

. . Enhances peaceful living
Due to the shape and structure of the natural fibres, sheep’s wool is very effective at absorbing sound so when you’re on the road, parked in a bustling campground or sitting in your van watching the rain pouring down outside, you will have  a quieter, more peaceful living space inside your camper van.

. . Stays together
A polyester binder is used in the production of Thermafleece to ensure that the fibers hold together and to maintain the insulation’s structure without slumping or disintegrating. This means that your Thermafleece sheep’s wool  Insulation will cope with every pothole and engine vibration that travelling life can throw at it.

. . And helps create a comfortable and eco-friendly mobile haven.
Thermafleece and the Thermofloc VSD (Variable Surface Diffusion ) membrane make the perfect combination. This sustainable and efficient pairing will help you create a comfortable and eco-friendly mobile haven.
Thermofloc VSD functions as an intelligent membrane and provides both air tightness and vapor control while permitting two-way movement of water vapor as conditions permit.
The VSD membrane enhances the breathability of Thermafleece by acting as an effective vapor control layer. Together, they allow moisture vapor to escape while preventing condensation buildup. This helps maintain a dry and healthy indoor environment, reducing the risk of mould and mildew.

Condensation building up?

If you decide against installing a membrane, you can expect a peak build-up of condensation of 7571 g/m2.  With an intelligent VSD membrane installed this will be reduced to 63 g/m3.  A reduction from 7 litres to 6 tablespoons!

Further Information

Installation tips:
Install the Thermofloc VSD on the warm side of the insulation.
Seal all joints, seams, and edges to create an airtight and moisture-resistant barrier.
You can then re-install -any interior fixtures, panels, or cabinetry you removed during the installation process.

Find out more about the different types of membrane available here

——————————–

Vanlife, I been told this
It’s a fine life, I’ve been sold this
It’s a fine line between having to and choosin’ it
Let’s roll up, let’s blow this


Willie Carlisle – VAN LIFE


Filed Under: Blog Tagged With: British sheeps wool insulation, campervan, conversion

by

Help! my builder says I need a membrane

Which one do I need and why? 

There are a number of different membranes which can be used within the building structure, each performs a different role and has different properties to offer. It is important to understand what each one does before you go ahead and purchase. Below, we give you a brief overview of the 4 most commonly used types of building membrane, then go on to answer one of the most common questions we get asked: “What is the difference between a VSD membrane and a Breather Membrane?”

The 4 most commonly used types of building membrane are:

  1. High vapour resistance Roofing Felt
  2. Vapour control layer
  3. Variable Surface Diffusion ‘Intelligent’ membrane
  4. Breather Membrane

High vapour resistance Roofing Felt:

Why do we  use High vapour resistance Roofing Felt?

Traditional roofing felt is a material typically made of a base fibre which is then coated with asphalt or tar. It is waterproof and is highly resistant to moisture/water vapour.

Although breather membranes have become increasingly popular due to their improved performance and durability, roofing felt is still commonly specified in building work if bats are present in the structure or by a conservation officer in a listed property / historic building to preserve the originality of the structure.

Vapour Control Membrane

What is a Vapour Control Membrane?

An air and  vapour control membrane is an airtight membrane made of plastic or foil which is used to reduce the movement of warm moist air from the inside of the building and stop it penetrating through to the actual building fabric. It is installed on the warm side of the insulation i.e., the inside of a pitched roof or the interior walls. 

How do Vapour Control Membranes actually work?

Vapour control membranes have one job and that is to stop moisture travelling from the inside of the building (i.e., the internal rooms) and through to the building fabric itself. This in turn designed to protect the building fabric from mould growth, decay and low air quality. Vapour control membranes do not allow moisture to travel back in to the building fabric which can be problematic as moisture gets trapped behind the membrane and has no means of escape.

Variable Surface Diffusion (VSD) Membrane

What is a Variable Surface Diffusion (VSD) Membrane?

Thermofloc Variable Surface Diffusion (VSD) is classed as an intelligent membrane, acting as an air tightness and vapour control membrane whilst allowing two-way movement of water vapour as conditions within the building allow.

Where do you install a VSD Membrane?

The VSD membrane is installed on the inside (warm side) of roof construction and the inside (warm side) of walls of timber frame structures and studwork,

What does a VSD membrane do?

VSD Membranes are used in building construction to control the movement of water vapour from the inside of the building and through to the building fabric itself, helping to prevent condensation from forming on the inside of the building fabric which can lead to mould growth , decay and low air quality. Because VSD membranes can effectively resist air pressure, they are used to improve air tightness and minimise air leaking within the building fabric.

How does a VSD membrane work and what is the difference between a vapour control membrane and an intelligent membrane?

As with a vapour control membrane, when humidity levels are high within the building, a VSD membrane will be vapour closed, i.e. they have a high vapour resistance. This prevents the water vapour in the humid air travelling through to the building fabric and forming interstitial condensation which in turn creates mould and decay.

The difference between a vapour control membrane and an intelligent membrane is that once the humidity levels drop then the ‘intelligent’ membrane will open up (vapour open state) and allow any trapped water vapour to escape. So, moisture that does enter the building fabric is able to back diffuse out of the building as the humidity levels decrease.

So now we have looked at the difference between the membranes installed on the warm side let’s take a journey to the cold side. ( the outer side nearest the wall/roof.)

Breather Membranes

What is a Breather Membrane and why do I need one?

A semi-permeable membrane designed to allow excess water vapour to pass from the inside of the building fabric out into the atmosphere, a breather membrane will prevent moisture, surface water or rainwater from entering from the outside.

Install a breather membrane on the cold side (outer) of the insulation – so the outside of a pitched roof, on the underside of suspended floor joists,  or the exterior walls of a timber frame building, or sometimes against the inside surface of a solid wall after the insulation.

The use of a Breather Membrane will help to prevent condensation, mould and decay within the fabric of the building which in turn helps to maintain humidity levels and create a healthier living/working environment.

How do Breather Membranes work?

Installed on the cold side of the insulation -The inside face of the Breather Membrane contains pores or holes which allow water vapour and other gas molecules to pass through from inside to the outside of the building.

Because these gas molecules are incredibly small (less than 3 millionths of 1mm) the membrane can appear solid to the naked eye but will still allow large quantities of water vapour to pass through.

The outside of the membrane stops liquid water ingress (rain/snow) from the outside of the building to the inside, serving as an extra layer of protection within the roof or wall when the cladding material itself may not be watertight (e.g. tiles)

Where do I use a Breather membrane?

Use a breather membrane in roofs and walls as well as on the underside of suspended floor joists  when installed from below.

They help keep the roof space dry, prevent condensation and maintain the effectiveness of the insulation.

In walls, breather membranes are installed behind the exterior cladding. They contribute to moisture management and a more energy-efficient building. They will also assist in maintaining a consistent indoor temperature by reducing heat loss through the walls and preventing drafts.

What if I don’t use a Breather Membrane in my roof or wall?

If you decide not to use a breather membrane you risk water passing through the tiles / stone/cladding on the external side.  A build-up of water in a structure is never good news. Excess moisture rots timbers, creates damp, allows mould spores to thrive  and renders any insulation ineffective. All of which leads to an unhealthy building and in turn an unhealthy living environment.

Thermafleece Breather Membrane – which way is up?

Thermafleece Breather Membrane has two sides. A grey side which has a higher UV stability than the other white side. When installing, the grey side should face outward (the cold side) and the white side should face inward  toward the inside of the building (the warm side). For example, when installing in a floor, the grey side faces the ground and in a roof, the grey side faces the sky.

To prevent accidental air leakage you can seal the joints in the membrane with a breathable tape.

Do I need to use a Breather Membrane when insulating a suspended floor?

Use a Breather Membrane  to support the insulation by hammocking it between suspended floor joists

Attach the membrane to the underside of the floor joists using either nails or staples.

Coverage and overlapping a breather membrane

When installing onto a wall or pitched roof, 1 roll of a membrane  with 75m2 coverage will actually cover about 60m2 allowing for overlaps.

If you are hammocking the membrane for a suspended floor then one 75m2 roll will cover approx. 45m2
There is no need for a membrane if you are insulating your loft, although because lofts are inherently dirty, and debris tends to fall  down from the roof, many people use them as a cover over the insulation to help keep it clean.

For further advice and installation diagrams take a look at our help and advice section https://naturalinsulations.co.uk/help-advice/

Product information and factsheets are available on our product section https://naturalinsulations.co.uk/membranes/

To find out more about Eden Renewable Innovations Ltd – The manufacturers of Thermafleece go to the website www.thermafleece.com


Filed Under: Blog Tagged With: AVCL membrane, breather membrane

by

Loft insulation – keeping you toasty and saving you money

Insulation saves heat and heat costs money. So, it’s a simple fact that if you’re saving heat, you’re saving money. The more you insulate the more heat you save and the less money you spend.  There is no better time than the present to check your existing insulation and make sure your loft is properly insulated for the autumn and winter ahead.

The more you insulate the more you save

If the existing insulation is in good condition and measures 270mm or more in depth, then you shouldn’t need to install more insulation.  However, if your loft is full of old insulation which has slumped and degraded, then the last thing you want to do is install more of the same.  If you do, someday you’ll return, look at the same scene and repeat the same exercise. Instead, use something that won’t slump or degrade and buy something that lasts. A natural fibre insulation which is thermally bonded with recycled polyester such as Thermafleece British Sheep’s Wool Insulation will ensure the insulation retains its loft and once you insulate, you won’t have to do it again.

There are also many other benefits of installing a natural fibre insulation: As well as keeping in heat, natural fibre insulations will help manage summer heat gain; help with moisture and humidity levels; reduce noise and improve sound quality. They are none itch, safe to install and can improve indoor air quality, sustainability, health and well-being inside your home.

The More Insulation the Better

The more insulation you can install the better, but typically you should install a natural fibre insulation to a depth of 240mm. It is not always necessary to remove your existing insulation. As long as it is in fairly good condition and there is no signs of water damage then you can top up with a good quality natural fibre or recycled polyester insulation.

In most lofts, it’s easy to install a deep layer of insulation. If you decide to board part of your loft you can use loft legs to raise the level of the boarding. This will still allow you to install a deep layer of insulation.

Remember that around 5% of heat is lost through your loft hatch, so it should also be insulated.

In a new property with a well-ventilated loft, a recycled polyester insulation such as SupaSoft Insulation will be very effective. SupaSoft insulation is a great way to use recycled single use plastics. It’s also safe to handle and itch free.

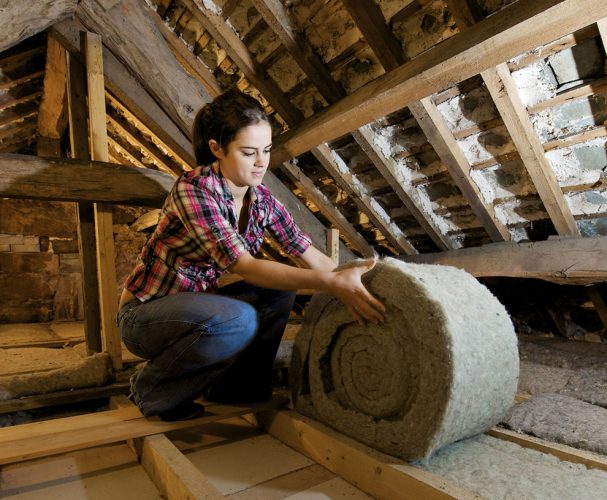
For an older property or if loft ventilation is limited,  use a natural fibre insulation such as Thermafleece CosyWool Roll. As well as being safe, sustainable and healthy, natural fibres can help regulate humidity levels. They do this by absorbing moisture and holding it in a safe form. It’s then released it as air around it becomes less humid.

In a nutshell

In a nutshell:  Insulation does much more than prevent heat loss so give this some thought when you decide what’s right for you. Choose a good quality  insulation which will last the lifetime of your building. You’ll never have to do it again and remember that over its life, insulating is never a costly investment.

Filed Under: Blog Tagged With: British sheeps wool insulation, insulate your loft, loft insulation, thermafleece

by

How much insulation do I need in my loft?

How do I measure and calculate how much insulation I need in my loft?

It is important to take the time to work out how much insulation you need to ensure you get the best fit and also, so you don’t over or under order.  Planning the installation is an important part of the job and correctly laid insulation significantly improves thermal performance.

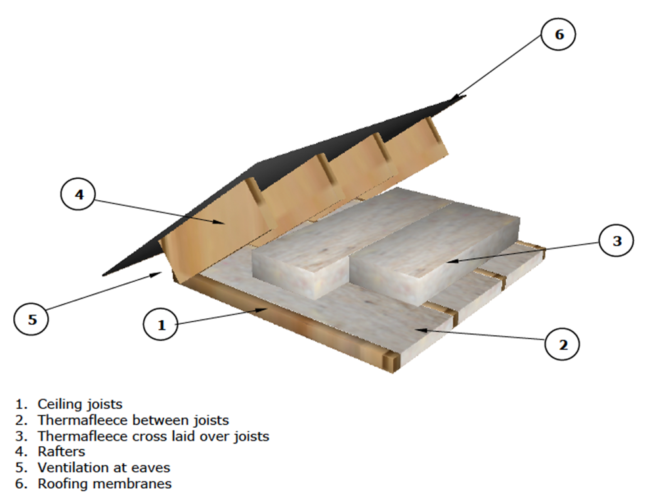
When insulating using Thermafleece we recommend you should install to a minimum depth of 240/250mm and ideally 300mm particularly for new build properties.  You will need to install one layer between the ceiling joists and one or more layers above the level of the joists.  The insulation above the joists is cross-laid over the joist meaning it runs perpendicular to the direction of the joist. The joists are the horizontal timbers that support the ceiling below the loft.  These are often confused with rafters which are the angled timbers that support the roof.

There are 3 simple steps to measuring for your loft

Step 1. Measure the total loft space. 

This will provide a total square metre requirement.  Simply multiply the length (in metres) by the width (in metres) of the loft to calculate the area in sq.m.  For the layer of insulation that is fitted between joists, deduct 10% of the loft area to account for displacement of the joists.  For insulation layers that sit above the level of the joists take the full loft area.  If you can’t access the loft or to give yourself a sense check, simply measure the outside of the building for dimensions.

Step 2.  Measure the space between your joists.

Measure the width between joist ensuring the tape measure runs perpendicular to the joist.  Repeat this to determine the minimum and maximum spacing between joists.  This will allow you to determine the  width of insulation required to fit between joists.  Often and especially in older properties the width does vary but several width options are available, and Thermafleece is a quilt material which is forgiving against the timbers.  Thermafleece is available in a variety of widths.  This is only required for the layer of insulation fitted between joists, layers cross-laid over joists do not need to fit between anything so we generally recommended our widest widths for this.

Step 3. Measure the depth of the joists.

Typically, if your joists are 100 mm thick, we would recommend you full fill the joists with  100 mm thick.   To increase the thickness and eliminate heat loss, we would recommend 100 between and at least 140 mm over the joist. This generally means that you put one layer between the joists then other layers running above the joists across the direction of the joist.

Example Using Thermafleece CosyWool Roll.
Space between joists is 350mm.  370mm insulation width required.

Loft Area – 9 metres x 7 metres  = total area 63m2

Joist depth – 100mm

Recommended Insulation depth is 240mm

Between the joists:
100mm thick x 370mm wide. 3 rolls in a pack and total m2 of one pack is 7.22m2

Area required is 63 sq.m less 10% = 56.7 sq.m

56.7 square metres ÷ 7.22 square metres per pack  = **7.85 packs

You would need to order 8 packs of 100 x 370 which will provide you with 57.8 sq.m to go between the joists.

Cross-laid over the joists *
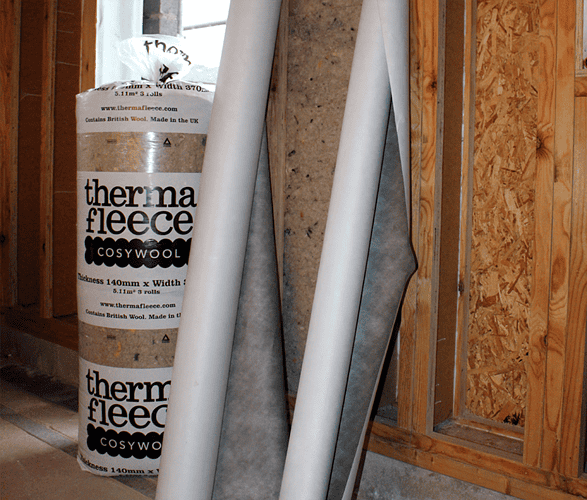
140mm deep x 570 wide 2 rolls in a pack and total m2 of one pack is 5.24m2

63 square metres ÷ 5.24 square metres per pack  = ** 12.02  packs

You would need to order 12 packs  of the 140 mm x  570mm which will provide you with 62.88 square metres to go crossways over the joists.

*Remember: Layers cross-laid over joists don’t need to fit between anything so we generally recommended our widest widths for this 

**We don’t split packs so depending on how generous your measurements are, round up or down

_____

Find out more:

Further information is available in our Help and Advice Section: https://naturalinsulations.co.uk/help-advice/

Thermafleece British Sheeps Wool:  https://www.thermafleece.com/

Featured Image is from the Cold Roof Application Notes, one of a series available in the Help and Advice Section

Filed Under: Blog Tagged With: how much insulation do I need?, insulation depth, loft insulation, measuring loft for insulation

  • 1
  • 2
  • Next Page »

QUICK LINKS
Payment Options: Card /  PayPal / SagePay Invoice / BACS
Typical Lead Time: 3 to 5 working days
Deliveries / Returns
Terms & Conditions
Privacy Policy

Natural Insulations,
Soulands Studios Ltd
Soulands Gate,
Dacre, Penrith,
Cumbria, CA11 0JF
T: 01768 485050
E: enquiries@naturalinsulations.co.uk

© 2025 Natural Insulations · All Rights Reserved · Sitemap · Site Credits: Launch Site

Thermafleece sheep's wool insulation, Thermafleece Natrahemp, Steico wood fibre insulation Thermofloc cellulose insulation made from recycled newspaper, SupaSoft insulation made from recycled plastic bottles  Contact us for Expert Advice, Samples, Best Prices, Fast Delivery